Leave Your Message

How to Install and Remove Bearings Step by Step

How to Install and Remove Bearings Step by Step begins with one practical truth: bearing life depends heavily on installation quality. This Bearing Installation & Removal Tutorial explains each stage with workshop-focused detail. It covers inspection, tool selection, alignment, controlled force, removal methods, and final checks. A clean bench matters. So does patience.

As bearing engineer Heinz P. Bloch has stated, “Reliability begins with correct installation.” That principle remains useful because excessive force can damage raceways, seals, or rolling elements. Never strike a bearing directly with a steel hammer. Use the correct sleeve, puller, induction heater, or hydraulic tool for the application. Keep hands clear, wear eye protection, and follow the manufacturer’s torque and temperature limits.

The procedure starts by checking the shaft, housing, bearing number, and fit tolerances. Dirt on a fingertip can become a serious defect inside the assembly. During installation, apply force only to the ring with the interference fit. During removal, support the component carefully and pull evenly. Do not reuse a bearing that shows brinelling, discoloration, cracked seals, or rough rotation. The final inspection should include rotation feel, axial movement, lubrication, and seal position.

Some steps look simple. They are not always forgiving. Even experienced technicians can rush a measurement or overlook a tilted bearing. This guide encourages careful decisions, clear records, and honest rechecking. Perfect technique is difficult, but preventable damage should never be accepted as normal.
How to Install and Remove Bearings Step by Step

Identify the Bearing, Fit, Tools, and Safety Requirements

How to Install and Remove Bearings Step by Step

Identify the bearing before touching the assembly. Read its identification marks, then verify bore, outside diameter, width, seal type, and internal clearance. Compare these details with the equipment drawing or service manual. A similar-looking bearing may require a different fit or load direction. Measure the shaft and housing with clean, calibrated instruments. Record the readings.

Fit matters. A rotating ring usually needs firm support against creeping, while a stationary ring may need less interference. Do not guess. Check the tolerance tables and operating temperature before selecting a replacement. I once trusted an old measurement and created unnecessary installation pressure. That mistake was avoidable.

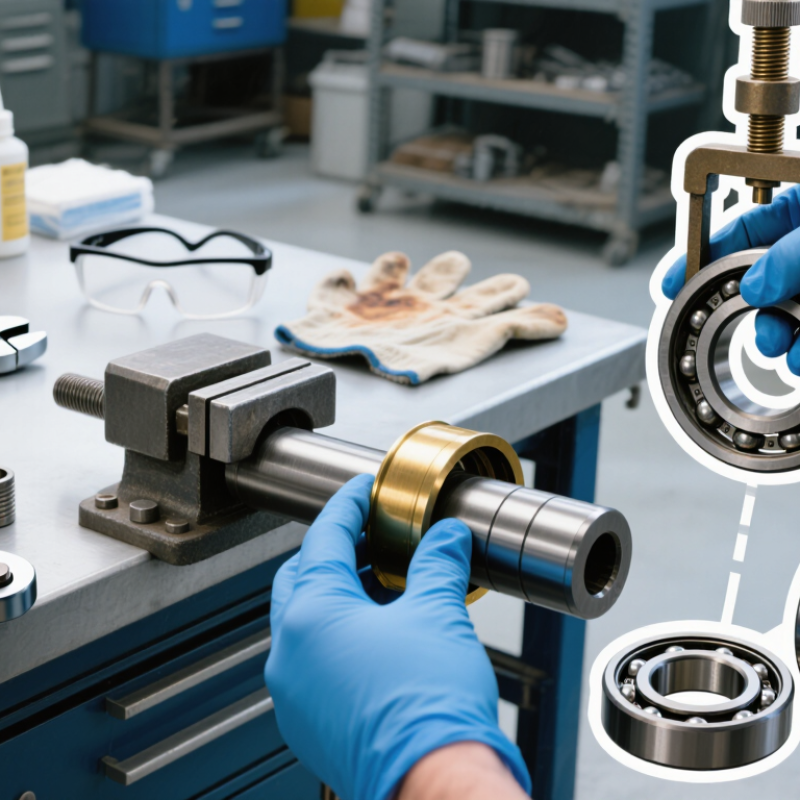
Use a suitable puller, press, soft-faced mallet, sockets, and circlip tools. A press should contact only the ring being fitted. Never transmit force through the rolling elements. For tight fits, controlled heating may help, but follow the bearing’s temperature limits. Keep the work area clean. Even a small metal chip can damage a raceway.

Before removal, isolate power and secure the equipment against movement. Wear eye protection, gloves suited to the task, and protective footwear. Release stored spring force or hydraulic pressure carefully. Inspect the shaft, housing, seals, and shoulders after removal. Scratches, fretting, or loose fits may be the real cause of failure, not the bearing itself. Take photos before disassembly. They can reveal orientation errors later.

How to Install and Remove Bearings Step by Step

Use the bearing designation to identify the bore size before selecting the fit, tools, and removal method. For standard metric rolling bearings, bore codes 00, 01, 02, and 03 represent 10, 12, 15, and 17 mm respectively; codes from 04 onward are multiplied by five to obtain the bore diameter in millimetres.

Installation: Confirm the bearing type and bore, clean the shaft and housing, check the fit, and apply force only to the ring being fitted. Use a press or properly sized fitting tools rather than striking the seals or rolling elements.

Removal: Support the component, use a suitable puller or hydraulic method, apply force to the fitted ring, and protect the shaft, housing, and surrounding parts. Wear eye protection and keep hands clear of pinch points.

Prepare the Shaft, Housing, and Work Area for Bearing Service

Bearing service begins before the bearing leaves its package.

Clear the work area and cover nearby machinery against dust. Good lighting matters.

Wear clean gloves, but keep them free from grease, grit, and loose fibers.

Lock out the machine before removing guards or applying tools. Wipe the shaft and housing with a lint-free cloth.

Inspect the shaft shoulder for burrs, scoring, rust, and raised metal. Check the housing bore for dents, cracks, and fretting marks. Measure critical diameters with calibrated instruments, then compare them with the service specification.

A visual check alone can miss a small but damaging size error.

I once trusted a clean-looking shaft and overlooked a slight shoulder burr. That mistake changed the fitting force.

Plan the removal path before pulling the bearing. Support the surrounding structure and apply force only to the ring with the interference fit. Never transfer removal force through the rolling elements when avoidable.

During installation, keep the new bearing sealed until the shaft and housing are ready. Align the parts carefully, and use a suitable sleeve or controlled press. The sleeve must contact the correct ring.

Do not strike the bearing directly or force it through an angle.

Clean assembly surfaces again before final placement. A tiny metal chip can create noise, heat, and early damage. Recheck alignment after fitting, because preparation is easy to rush and difficult to correct later.

Remove the Bearing Without Damaging the Shaft or Housing

How to Install and Remove Bearings Step by Step

Remove the Bearing Without Damaging the Shaft or Housing

Bearing removal starts with identifying the correct force path. A puller should contact the ring with the interference fit, not the seals or rolling elements. If the bearing fits tightly on the shaft, apply force to the inner ring. If it sits tightly in the housing, support the outer ring instead. Guesswork is expensive.

I have seen shafts damaged by direct hammering, even during routine maintenance. Use a properly sized puller, keep it square, and increase pressure gradually. Light, controlled taps may help a stuck bearing, but never strike the new bearing or its rolling elements. Protect exposed threads and nearby seals before applying force. A small amount of approved penetrating fluid may loosen corrosion, but it cannot replace correct tooling.

After removal, clean the shaft and housing with a lint-free cloth. Check for raised metal, fretting marks, cracks, and discoloration. Measure critical surfaces with suitable precision tools. A bearing can feel smooth while the housing fit is already too loose. I still recheck measurements, because visual inspection misses small damage. Remove burrs carefully, without reducing the required diameter. During installation, press only against the ring receiving the fit, and keep the bearing aligned throughout the operation. Stop if resistance rises unevenly. That usually signals misalignment, contamination, or an incorrect fit.

Install the New Bearing with Proper Alignment and Force

How to Install and Remove Bearings Step by Step

Install the new bearing with proper alignment and force. Clean the shaft, housing, and tools before opening the package. Even a small metal chip can create a false preload. Measure the shaft and housing with calibrated equipment. ISO 15243:2017 identifies misalignment, contamination, and mounting damage as distinct bearing failure mechanisms. These are preventable, but workshop habits are not always perfect.

Apply force only to the ring receiving the interference fit. Pressing through the rolling elements can create invisible brinelling. Use a press, mounting sleeve, or controlled induction heater. Never hammer the bearing directly. Keep the sleeve square against the ring. Check movement after installation. It should feel smooth, without scraping or tight spots. I have seen technicians rush this step. The bearing looked seated, but the shaft shoulder was not fully contacted.

The U.S. Department of Energy’s Operations and Maintenance Best Practices Guide reports that predictive maintenance can reduce costs by 8–12% compared with preventive maintenance. That benefit depends on accurate installation records. Record the bearing code, measured fits, heating temperature, applied force, and final clearance. For removal, pull through the fitted ring and protect the shaft from jaw marks. Recheck alignment after assembly. One missed measurement can erase good workmanship. In practice, this is where installation methods still need honest review.

Inspect the Assembly and Verify Smooth Bearing Operation

After removing a bearing, inspect the entire assembly, not only the raceways. Look for fretting marks, blue heat stains, dents, metal flakes, and uneven grease. Check the shaft and housing with calibrated measuring tools. A bearing can appear clean yet run poorly. It happens.

ISO 15243 classifies common damage patterns, including fatigue, contamination, poor lubrication, and mounting damage. Use these categories to connect visible marks with likely causes. The U.S. Department of Energy’s Operations and Maintenance Best Practices Guide reports that predictive maintenance can reduce downtime by 35–45%. That supports checking vibration, temperature, and noise before installation. A useful field test is simple: rotate the bearing slowly by hand. It should feel consistent, without clicking or tight spots. Do not mistake slight seal drag for internal damage.

During installation, apply force only to the ring receiving the fit. Never press through the rolling elements. Confirm the bearing seats fully against the shoulder, then verify axial clearance and alignment. After assembly, rotate the shaft by hand and listen closely. A dry scrape, repeating tick, or sudden resistance needs investigation. Check nearby seals, spacers, and fasteners too. One overlooked spacer can distort an otherwise correct installation.

Removal also deserves careful review. Record the bearing’s position, damage pattern, and removed lubricant before cleaning. This evidence can expose installation errors that routine replacement hides. The process is not flawless; measurements may disagree slightly. Recheck them before accepting smooth operation.